How to Set Up Claude Code Hooks: Step-by-Step Tutorial
Claude Code hooks are custom shell commands that execute automatically at specific points in your coding workflow. Instead of asking Claude to format code or check permissions manually, hooks enforce these actions deterministically. This tutorial walks you through setting up your first hook, then covers common patterns for notifications, auto-formatting, and protecting sensitive files.
Who this is for: Developers using Claude Code who want to automate repetitive tasks and stay in flow without manual intervention.
Key trade-offs: Hooks add complexity to your setup but eliminate context-switching by handling routine work automatically. The payoff is staying focused on what matters.
Why this matters: According to Anthropic's hooks documentation, hooks provide deterministic control over Claude Code's behavior, ensuring certain actions always happen. This prevents the frustration of hitting usage limits mid-session or forgetting to run formatters before committing.
What are Claude Code hooks?
Hooks are automated triggers that run shell commands when specific events happen in Claude Code. Think of them as "if this happens, then run that command" rules. When Claude finishes editing a file, formats code, requests permission, or needs your input, a matching hook can fire automatically.
Unlike traditional CI/CD pipelines, hooks run locally during your Claude Code session. They communicate through standard streams: your script reads JSON from stdin (the hook event data), processes it, and tells Claude Code what to do next via exit codes.
Three types of hooks:
- Command hooks — Run shell scripts or one-liners (most common)
- Prompt hooks — Use Claude to make judgment-based decisions
- Agent hooks — Spawn a subagent with tool access for verification
This tutorial focuses on command hooks, which are the fastest to set up and cover 95% of real-world use cases.
Key hook lifecycle events
Hooks can fire at twelve different points in Claude Code's lifecycle. Here are the most useful ones for automating your workflow:
- SessionStart — Inject context or reminders when you begin a session
- UserPromptSubmit — Validate or modify your prompt before Claude sees it
- PreToolUse — Block dangerous commands before they execute (e.g., prevent
drop table) - PostToolUse — Auto-format code after Claude edits a file
- Notification — Get desktop alerts when Claude needs your input
- Stop — Run checks before Claude finishes (verify tests pass, for example)
Each event includes matcher support, so you can filter by tool name (e.g., only format after Edit and Write calls, not every tool), session source, or notification type.
Step 1: Set up your first hook with the /hooks menu
The fastest way to create a hook is through Claude Code's interactive menu. This walkthrough creates a desktop notification hook so you get alerted when Claude finishes working and needs your input.
Open the hooks menu:
- Type
/hooksin the Claude Code CLI - You'll see a list of all available hook events plus options to disable hooks globally
- Select
Notificationto create an alert hook
Configure the matcher:
- The menu shows available matchers (different notification types)
- Set the matcher to
*to fire on all notification types - You can narrow this later to specific types like
permission_promptoridle_prompt
Add your command:
Select + Add new hook… and paste the command for your operating system:
- macOS:
osascript -e 'display notification "Claude Code needs your attention" with title "Claude Code"' - Linux:
notify-send 'Claude Code' 'Claude Code needs your attention' - Windows:
powershell.exe -Command "[System.Reflection.Assembly]::LoadWithPartialName('System.Windows.Forms'); [System.Windows.Forms.MessageBox]::Show('Claude Code needs your attention', 'Claude Code')"
Choose storage location:
- The menu asks where to save the hook configuration
- Select
User settingsfor~/.claude/settings.json(applies to all projects) - Or choose
Project settingsfor.claude/settings.json(this project only)
Test the hook:
Press Esc to exit the menu. Ask Claude to do something that requires permission, then switch away from the terminal. You should receive a native desktop notification within seconds.
Step 2: Auto-format code after edits
Automatically run Prettier (or any formatter) on every file Claude edits. This keeps formatting consistent without asking you each time.
Add this to .claude/settings.json in your project root:
{
  "hooks": {
    "PostToolUse": [
      {
        "matcher": "Edit|Write",
        "hooks": [
          {
            "type": "command",
            "command": "jq -r '.tool_input.file_path' | xargs npx prettier --write"
          }
        ]
      }
    ]
  }
}
How it works:
- The
PostToolUseevent fires after Claude uses a tool - The
Edit|Writematcher ensures it only runs after file-editing tools (notBash,Read, etc.) - The command extracts the edited file path from the hook's JSON input using
jq - Prettier reformats that file automatically
Note: You'll need jq installed for JSON parsing. Install with brew install jq (macOS) or apt-get install jq (Ubuntu/Debian).
This pattern works with any formatter: ESLint, Black, gofmt, or custom shell scripts. Just replace prettier --write with your formatter's command.
Step 3: Block edits to protected files
Prevent Claude from accidentally modifying sensitive files like .env, package-lock.json, or anything in .git/. Claude receives feedback explaining why the edit was blocked and can adjust its approach.
Create `.claude/hooks/protect-files.sh:
#!/bin/bash
# protect-files.sh

INPUT=$(cat)
FILE_PATH=$(echo "$INPUT" | jq -r '.tool_input.file_path // empty')

PROTECTED_PATTERNS=(".env" "package-lock.json" ".git/")

for pattern in "${PROTECTED_PATTERNS[@]}"; do
  if [[ "$FILE_PATH" == *"$pattern"* ]]; then
    echo "Blocked: $FILE_PATH matches protected pattern '$pattern'" >&2
    exit 2
  fi
done

exit 0
Make the script executable (macOS/Linux):
chmod +x .claude/hooks/protect-files.sh
Register the hook in .claude/settings.json:
{
  "hooks": {
    "PreToolUse": [
      {
        "matcher": "Edit|Write",
        "hooks": [
          {
            "type": "command",
            "command": "\"$CLAUDE_PROJECT_DIR\"/.claude/hooks/protect-files.sh"
          }
        ]
      }
    ]
  }
}
The PreToolUse event fires before any tool execution, so your script can block the action. Exit code 2 means "block this and send feedback to Claude." Exit code 0 means "proceed."
Step 4: Re-inject context after compaction
When Claude's context window fills up, the system performs automatic compaction to summarize and free space. This can lose critical project details. Use a SessionStart hook with a compact matcher to re-inject important context after every compaction.
Add this to .claude/settings.json:
{
  "hooks": {
    "SessionStart": [
      {
        "matcher": "compact",
        "hooks": [
          {
            "type": "command",
            "command": "echo 'Reminder: use Bun, not npm. Run bun test before committing. Current sprint: auth refactor.'"
          }
        ]
      }
    ]
  }
}
Any text your command writes to stdout is added to Claude's context automatically. Replace the echo with dynamic output like git log --oneline -5 to show recent commits, or cat project-guidelines.md to inject conventions.
Tip: For context that should persist across all sessions (not just after compaction), use a CLAUDE.md file instead.
Understanding hook communication
Hooks use stdin, stdout, stderr, and exit codes to communicate with Claude Code. When an event fires, Claude Code passes event-specific data as JSON to your script's stdin.
Example input (PreToolUse event):
{
  "session_id": "abc123",
  "cwd": "/Users/sarah/myproject",
  "hook_event_name": "PreToolUse",
  "tool_name": "Bash",
  "tool_input": {
    "command": "npm test"
  }
}
Exit codes have standard meanings:
- Exit 0: The action proceeds. For
UserPromptSubmitandSessionStarthooks, anything you write to stdout is added to Claude's context - Exit 2: The action is blocked. Write a reason to stderr, and Claude receives it as feedback so it can adjust
- Other codes: The action proceeds. Stderr is logged but not shown to Claude
For advanced control, your script can return structured JSON instead of relying on exit codes. This lets you provide permission decisions, reasons, or additional context in a single response.
Common hook patterns
Log every Bash command executed:
{
  "hooks": {
    "PostToolUse": [
      {
        "matcher": "Bash",
        "hooks": [
          {
            "type": "command",
            "command": "jq -r '.tool_input.command' >> ~/.claude/command-log.txt"
          }
        ]
      }
    ]
  }
}
Audit configuration changes:
{
  "hooks": {
    "ConfigChange": [
      {
        "matcher": "",
        "hooks": [
          {
            "type": "command",
            "command": "jq -c '{timestamp: now | todate, source: .source, file: .file_path}' >> ~/claude-config-audit.log"
          }
        ]
      }
    ]
  }
}
Verify tests pass before allowing Claude to finish:
{
  "hooks": {
    "Stop": [
      {
        "hooks": [
          {
            "type": "agent",
            "prompt": "Verify that all unit tests pass. Run the test suite and check the results.",
            "timeout": 120
          }
        ]
      }
    ]
  }
}
This last example uses an agent-based hook, which spawns a subagent with tool access to verify conditions beyond what a simple command can check.
Hook configuration locations and scope
Where you add a hook determines who can use it and how broadly it applies:
- ~/.claude/settings.json — All your projects on this machine (personal, not shareable)
- .claude/settings.json — Single project (shareable; can commit to version control)
- .claude/settings.local.json — Single project (personal, gitignored)
- Managed policy settings — Organization-wide (admin-controlled)
- Plugin or skill frontmatter — Scoped to that component (shareable)
Hooks added through the /hooks menu take effect immediately. If you edit settings files directly while Claude Code is running, changes won't take effect until you restart your session or reload via the /hooks menu.
Troubleshooting hooks
Hook not firing:
- Run
/hooksand confirm it appears under the correct event - Check that the matcher pattern is case-sensitive and matches exactly
- Verify you're triggering the right event (PreToolUse fires before tool execution; PostToolUse fires after)
Hook error in output:
- Test your script manually by piping sample JSON:
echo '{"tool_name":"Bash","tool_input":{"command":"ls"}}' | ./my-hook.sh - Check the exit code:
echo $? - If "command not found," use absolute paths or
$CLAUDE_PROJECT_DIRto reference scripts - Make sure scripts are executable:
chmod +x ./my-hook.sh
JSON validation failed:
If your shell profile contains unconditional echo statements, they get prepended to your hook's output and break JSON parsing. Wrap them in a check for interactive shells:
# In ~/.zshrc or ~/.bashrc
if [[ $- == *i* ]]; then
  echo "Shell ready"
fi
Debug mode:
Toggle verbose output with Ctrl+O to see hook execution details in the transcript, or run claude --debug for complete hook logs including which hooks matched and their exit codes.
Stay in flow with Usagebar
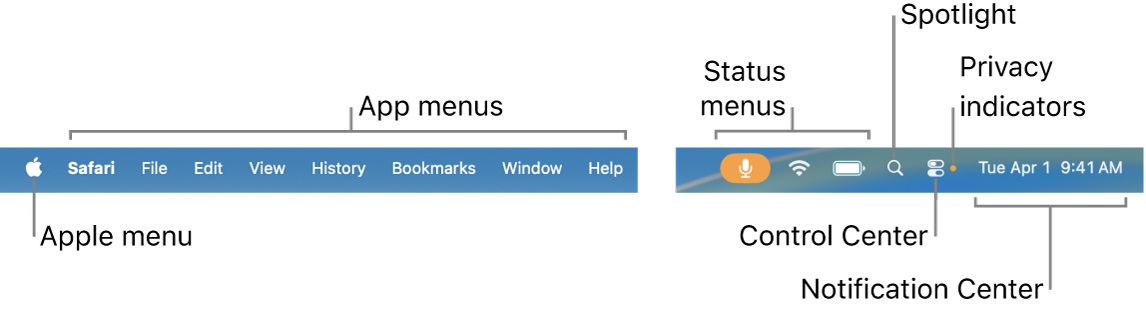
Hooks prevent interruptions from manual task execution, but one interruption remains: hitting your usage limit during critical work. Usagebar prevents that frustration by monitoring your Claude Code usage in the macOS menu bar with smart alerts at 50%, 75%, and 90% of your limit.
Unlike checking usage manually through /usage or visiting claude.ai/settings/usage, Usagebar keeps you informed without breaking context. Credentials are stored securely in macOS Keychain, and you pay what you want—including a free option for students.
Combined with hooks for auto-formatting and permission-blocking, you eliminate both routine interruptions and surprise lockouts. Get Usagebar to complete your flow-focused Claude Code setup.
Next steps
- Explore the full hooks reference for advanced features like async hooks and MCP tool integration
- Create project-specific hooks in
.claude/settings.jsonto enforce team conventions - Combine hooks with Claude Code skills for custom slash commands
- Review security considerations before deploying hooks in shared environments
Track Your Claude Code Usage
Never hit your usage limits unexpectedly. Usagebar lives in your menu bar and shows your 5-hour and weekly limits at a glance.
Get Usagebar